Monday, January 31, 2011

Baked Ziti

I've got another yummy recipe for you today! This was one of my frozen meals that I made before classes started this semester, and it was really good!


Recipe adapted from here.

Ingredients:
1 pound cottage cheese
2 eggs, lightly beaten
1 1/2 cups grated parmesan cheese
1 pound ziti (or similar pasta, I used macaroni because that's what we had!)
2 tbsp olive oil
5 cloves garlic, finely minced (Sidenote: Jeff got me a garlic press for Christmas, and I LOVE it!)
1 (28oz) can tomato sauce
1 (14.5oz) can diced tomatoes
1 tsp dried oregano
1 tsp dried basil
1 tsp sugar
Black pepper
3/4 tsp cornstarch
8 oz shredded mozzarella cheese

Directions:
1. Preheat the oven to 350.
2. Whisk together the cottage cheese, eggs, and 1 cup of the parmesan. Set aside.
3. Cook pasta in boiling water with a tablespoon of salt, stirring occasionally. Cook only until it is softened, but not yet cooked all the way through -- about 7 minutes. Drain. (Don't wash the pot - you'll use it later!)
4. Heat olive oil and garlic over medium heat in a large skillet until garlic is fragrant, but not browned (about 2 minutes). Stir in the tomato sauce, diced tomatoes, sugar, basil, and oregano. 
5. Simmer until thickened -- about 10 minutes. Take off of heat and season with salt and pepper.
6. Stir the cornstarch and heavy cream together in a large pot (the one that pasta cooked in!!). Set the pot over medium heat and bring to a simmer. Cook until thickened (3-4 minutes) and remove from the heat.
7. Add the cottage cheese mixture into the heavy cream pot. Then add 1 cup of the tomato sauce mixture, half of the mozzarella, and all the pasta. Stir to combine.
8. Put the pasta mixture into a lightly-greased 9x13 pan. Spread the rest of the tomato sauce mixture over the pasta. Sprinkle the rest of the mozzarella and parmesan cheeses on top. 
9. Cover the baking dish with foil that has been lightly sprayed with cooking spray. Bake for 30 minutes.
10. Remove foil and cook for another 30 minutes, or until the cheese is bubbling and beginning to brown. Cool for 10 minutes and serve!

Note: To freeze this, prepare up to step 8 and then cover with foil (a double layer!) and freeze. Thaw in the fridge 1-2 days, and cook for 1 hour covered, then 30 minutes uncovered.

This is the cottage cheese mixture. (step 2)

Here's the tomato sauce mixture. (step 4)

Here's the heavy cream pot! (step 6)

Adding a cup of the tomato sauce mixture to the heavy cream pot... (step 7)

Here's the pasta mixture (step 7)

(step 8) After this you would add the rest of the tomato sauce mixture, and then the cheese.

All done! (step 10)

Yummy!

Sunday, January 30, 2011

Interviews and Suits and Such...

I'm in the process of applying for summer legal internships. Being out in the world searching for employment is kind of a new thing for me, and I've definitely been pushing myself outside of my comfort zone with all the interviewing, networking, and resume-mailing.

Until now, I had never interviewed for a job that I wasn't 95% sure I would get, and my biggest job so far (as a music teacher) involved more of a clarinet-playing audition than an interview. I didn't even own a suit until a few months ago. But now, I'm printing resumes on fancy paper and mailing them off with cover letters, and I'm going out into the big world wearing a suit and shaking hands and interviewing my heart out. It's like I'm a grown-up or something!

Look at me in my fancy suit! I took this picture for the sole purpose of posting it on the blog to prove to y'all that I actually am doing something productive with my life.

Back before I was dating Jeff (like, in middle school and the first three years of high school), I used to say that I wanted to just be a businesswoman and be successful and then worry about getting married when I was 30 or 32 or so. I really had my life planned out that way. But then of course, things happened a bit differently and I ended up marrying my best friend at the age of 21. That's what life does when you try to make big plans!

So now I'm reconnecting with my career-woman self and venturing into downtown Houston and going into really tall buildings, and I just feel so, so out of my comfort zone! But it's a little fun, and I feel a little adventurous, and I'm feeling a lot better about the whole thing now because on Friday I was offered a summer internship with a court here in Houston, and it's pretty much my dream job, and the people at the office are so nice, and I'm so, so excited! It's a part-time, 3-days-a-week-ish thing, so I'm still looking for something additional, but I have a few applications pending with some non-profits that are looking good.

I had Jeff take this picture because the last one (above) turned out so grainy and weird.

I should mention (because you guys like it when I contrast real-life law school with Legally Blonde)... the legal job hunt has so many random rules! Suits with pants are not okay for women. No necklaces, no bracelets, and no rings other than the wedding type and the class ring type. Earrings must be studs. Pantyhose are of vital importance, and if you're a girl - you better pull your hair back. Thank goodness I have a career advisor to tell me this stuff. Basically, if you're Elle Woods, you're gonna look really dumb in your pink suit. 

They suggested white shirts, but I clearly didn't quite follow that rule. I just felt entirely too much like a hostess at a fancy restaurant or a penguin or something. Plus, I only have one white button-down shirt, and I didn't want to wash it over and over again. Ha. 

After every interview, you have to send a hand-written thank-you note to your interviewer. And if you interviewed with more than one person at the same office, you better make sure they're personalized and different because they just might compare thank-you notes and catch you if you wrote the same thing twice (apparently). Oh, and here's the weird etiquette thing about internships with courts -- if they offer you a position, you HAVE to take it. Then you promptly have to call any other courts you've applied to and withdraw your application. You don't turn down a judicial internship. Period. So you have to be careful where you apply and try to interview in order of preference. Weird.

But, there is a plus side to the whole interviewing thing -- it's a great excuse to buy new shoes! I fell absolutely in love with this Adrienne Vittadini pair, and I've been wearing them to every interview I have! Love, love, love the patent toe!


Is anybody else doing the interview thing currently? What's your biggest strength and weakness? (Just kidding! I HATE that question by the way!) Am I the only one that feels like I should leave 90 minutes before an interview to make sure I make it on time? 

Thursday, January 27, 2011

Creamy Green Chile Enchiladas

Okay this recipe is really good. Like seriously good. And I live in Texas, so I know enchiladas. Haha. I only post recipes on the blog when I think they were pretty darn tasty, but this one was even tastier than that. We'll just say I'm REALLY glad I made two batches and put one in the freezer for later. :o)

Recipe adapted from here.

Ingredients:
10 8-inch flour tortillas
8 oz shredded monterrey jack cheese
Handful of fresh, chopped cilantro

Filling
3 cups cooked, chopped chicken (seasoned with cumin & salt & pepper)
2 4oz cans green chiles, lightly drained
1 8oz package cream cheese, cubed and softened
1 can black beans, rinsed and drained

Sauce
2 tbsp butter
1/2 medium onion, chopped
2 tbsp flour
1/3 c chicken broth
1/4 c milk
1/4 tsp salt
1/4 tsp pepper
1 can (7-9oz) green chile enchilada sauce (in the International foods aisle)
1/2 c sour cream

Directions:
1. Preheat oven to 375.
2. In a medium bowl, combine cream cheese and green chiles. Mix well. Add in chicken and beans. Combine and set aside.
3. In a large skillet, melt butter. Add the onion and cook over medium heat until translucent, 3-4 minutes.
4. Sprinkle the flour over the onions and stir. Cook for one minute, stirring.
5. Slowly add the chicken broth and milk. Continue to stir. The flour will get less lumpy around the onions and the mixture will become smooth.
6. Cook over medium heat until the mixture is bubbling and has thickened, about 3-4 minutes.
7. Remove the skillet from the heat and stir in the enchilada sauce and sour cream.
8. Lightly grease a 9x13 pan (or be like me and use two smaller pans so you can freeze one!). Spread 1/2 cup of the sauce in the bottom of the pan.
9. Fill each tortilla with about 1/2 cup of the chicken mixture, place a couple tablespoons of cheese on top, roll it up, and place it seam-side-down in the pan. (Make sure you save at least 1/2 cup cheese for the top of the enchiladas!)
10. Pour the rest of the sauce over the enchiladas, and top with the rest of the cheese.
11. Bake 20-30 minutes, until enchiladas are bubbling and slightly brown on top.
12. Sprinkle with cilantro and serve!

Here's my chicken. I just used frozen chicken breasts and baked them in the oven with some cumin, salt, and pepper. Then I cut them into small chunks.

Green chiles and cream cheese.

Here's the chicken mixture.

This is what the onions look like while being cooked.

This is what the onions look like when you add the flour.

This is what the onions look like when you add the milk and chicken broth.

This is what the onions look like after it thickens.

This is what the sauce looks like.

Here's a filled enchilada, pre-rolling.

Here's a pan of enchiladas! (Note: I did two smaller pans rather than one 9x13) You can't see it in the picture, but there's a little layer of sauce underneath them.

Top with the sauce and cheese...

This is what they look like cooked!

I totally forgot to put the cilantro on top of these... they just smelled so good that we wanted to eat them right away! Haha. I stuck the cilantro in one of those green-stay-fresh-tupperware things... hopefully it'll still be good when we eat the second pan in a week or so!

Tuesday, January 25, 2011

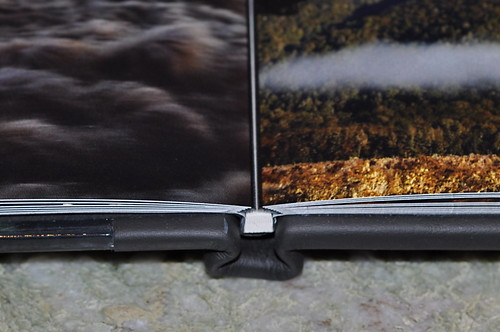
Photo-Book Knowledge!

I did a TON of research on various photo-book online retailers before (and after) ordering our wedding album. I know I have a lot of newlywed readers (and other people who just like to book-ify their photos!), so I'm going to run through a brief list of things I have learned, and hopefully it will help some of you out!

Remember, I did all of my research with the assumption that I was making a 75-100 page medium-sized wedding album with black backgrounds with a $100ish budget (so I didn't even consider retailers that limit you to 50 or 75 pages, I didn't do any research on options for fancy backgrounds/embellishments, and I didn't look into the fancier pro-quality books).

1. If having a long-lasting album is important to you, make sure you go with one of the companies that prints on ARCHIVAL paper. This would include (according to my understanding) MyPublisher, AdoramaPix, Kodak Gallery, and Inkubook. Companies that do not print on archival paper (according to what I've found, I could be wrong on this) include Shutterfly, Snapfish, and Blurb. If a retailer's website doesn't advertise that they use archival paper, they probably don't.

2. Here are some really helpful comprehensive reviews that I've found. I'm not sure that I totally agree with every aspect of them, but they're a great starting point.

Digital Home Thoughts (I read this one first, and it was SO helpful!)
Top Ten Reviews (Adds in a cost vs. quality comparison)
Biggest Conglomeration of Photobook Reviews Ever (Really detailed, but judges on price/options/software, not paper/photo quality)

3. Wait for coupons. Sign up for the retailer's email list and create your photo book, and then WAIT to order it until you get a good coupon in your inbox. For Shutterfly, the best one I've seen is a free 8x8 20-page book coupon (so you just have to pay the per-page cost for pages over 20). For MyPublisher, I've been on the mailing list for two months or so, and I've already seen a Buy-One-Get-One-Free, a 30% off, and a 60% off.

4. Lay-flat pages. I wanted lay-flat pages, so I did quite a bit of research on who has them and such. Here's the summary: Picaboo has them, but only in their fanciest books, which have pretty fancy price tags. MyPublisher has them for $25/book, but they make your pages lose a centimeter or so at the gutter (center of the book). AdoramaPix has them, but they limit their books to 50 pages. A company called SmileBooks has them, but they're on the pricier side (but not too bad!) and I know absolutely nothing about their books' quality. Many other fancier, expensive-er retailers have them too, but they were out of my price range so I never really looked into them.


When all was said and done, I decided to order through Shutterfly to get the best bang for my buck (for our honeymoon and engagement albums), and I went with MyPublisher to get maximum print quality, archival paper, and great customer service without spending a fortune (for our wedding album).

I'll do a post on our finished wedding album soon... just wait until you hear how great MyPublisher's customer service was!!

Monday, January 24, 2011

Slow-Cooker Beef Stroganoff

Here's another slow-cooker recipe that I tried out recently. I usually don't like beef (even if it's a "good" steak or whatever), so this wasn't my favorite recipe, but Jeff liked it quite a bit so I figured it was safe to share it on the blog! Most beef stroganoff recipes use sour cream, but this one uses cream cheese, which is good because it reheats much better if you have leftovers. Speaking of leftovers, this recipe makes more than enough for two people to eat it for two dinners. So you're gonna have leftovers. Or you could half the recipe. :o)

Recipe adapted from here.

Ingredients:
1 pound cubed beef stew meat
2 (10.75 oz) cans condensed golden mushroom soup (make sure you use GOLDEN mushroom, not cream of mushroom)
1 package onion soup mix
1 tbsp Worcestershire sauce
1/4 cup water
4 oz cream cheese, cubed and softened
1 can sliced mushrooms, drained
Egg noodles

Directions:
1. Put the meat, soup, onion soup mix, Worcestershire sauce, and water into the slow cooker.
2. Cook on low for 8 hours or on high for 5 hours.
3. Stir cream cheese into the slow cooker until it has melted. Add mushrooms.
4. Cook egg noodles according to package directions. Drain.
5. Serve beef stroganoff over egg noodles.

This is what beef stew meat looks like.

This is what golden mushroom soup looks like.

Before cooking...

After cooking, and adding the cream cheese and mushrooms.

Egg noodles!

Ta-da!

Sunday, January 23, 2011

Slow-Cooker Chicken & Dumplings

Last semester my law school schedule kept me out of the house for over 8 hours every day, so it was hard for me to do slow-cooker meals without feeling they were a bit overcooked. This semester I can come home earlier some days, so I've been trying to use our Crock-Pot more often. This is a really yummy slow-cooker recipe, and it's perfect for the cold nights we've been having!


Recipe adapted from here.

Ingredients:
4 chicken breasts (frozen)
2 tbsp butter
2 (10.75 oz) cans condensed cream of chicken soup
1 small onion, finely diced
1 (10 oz) package refrigerated biscuit dough
1 14 oz can chicken broth

Directions:
1. Place the chicken breasts (whole and frozen), butter, soup, onion, and chicken broth in a slow-cooker.
2. Cover, and cook on high for 5 hours (or low for 7-8 hours would work too).
3. Tear each biscuit into four pieces, and add the pieces into the slow-cooker. Push the biscuits down into the liquid a little. Take out the chicken, break it into pieces, and put it back in the slow cooker.
4. Cover and cook on high for another 90 minutes, or until the dough is no longer raw in the center.


Mmm!

Thursday, January 20, 2011

Raspberry Swirl Cheesecake

I'm so excited about this cheesecake! You ladies should save this recipe for Valentine's Day because it's just so cute and appropriately colored and fancy enough for a holiday! Cheesecake is my new favorite think to bake. I love how it can be light & fruity, or it can be rich & decadent, all depending on what little ingredients you add to it. I love how moist it is, and I love my springform pan. I had a dream the other night that I opened a cheesecake bakery. Just cheesecakes. Yum.

Today, I have a cute little simple cheesecake recipe for you. It's so simple that you could do it in a 9x13 pan if you want! The cheesecake and raspberry part comes from my sorority's cookbook, and the other parts I just made up as I went (but I actually remembered to measure things out so I could tell you about it!).


This cheesecake has four parts:
1. Crust
2. Cheesecake with raspberry swirl
3. White chocolate ganache
4. Icing/raspberry drizzle/white chocolate pieces for decoration (optional)

See? Pretty layers!

Here's the recipe:

Crust:
1 1/4 crushed graham cracker crumbs
1/3 c margarine, melted
1/4 c sugar

Combine well and press into the bottom of a 9-inch round springform pan (make sure it goes just a teensy bit up the sides as well).


Filling:
1 8oz packages cream cheese, softened
3 eggs
1 14oz can sweetened condensed milk
1/4 c lemon juice

Beat cream cheese and condensed milk until smooth (hand mixer or stand mixer will do!). Add eggs and lemon juice. Pour on top of prepared crust.


Raspberry Swirl:
1/2 bag frozen raspberries, defrosted
3 tbsp sugar
1 tbsp flour

Mix well, squishing the raspberries a bit (if you really want all the little raspberry bits to be gone, then mix it in a blender or food processor. I liked the little raspberry bits... it makes it seem fresh!). Microwave for 1 minute; stir. Pour in lines on top of cream cheese filling. Use a knife to swirl the raspberry mixture.


Bake at 300 for 50-55 minutes.  Remove from oven and let cool on a wire rack. Refrigerate.


White Chocolate Ganache:
1 oz white chocolate (chips or a 1oz square)
1/4 cup butter
1 cup powdered sugar

Melt the chocolate and butter over very low heat, stirring constantly (I don't have photos of this, due to the whole stirring constantly thing). Once melted, mix in the powdered sugar and stir until smooth. Pour over the COOLED cheesecake and spread evenly. Put the cheesecake back in the fridge.

The cheesecake should be in the fridge for at least a couple hours before you eat it... overnight would be ideal.

Decorating:
This is where you can get creative. I thought I was getting creative, but I ended up creating a frumpy little weird cake. I'll tell you about what I used, but really... if I had to do it again, I'd just use some white chocolate shavings on the top and call it a day! This is one of the ugliest cakes I've ever decorated!

Ugh. It looks like someone was stabbed on top of it. Dumb raspberry sauce.

Basic vanilla icing: (1 tsp vanilla, 1 tbsp milk, 1 cup powdered sugar - mixed well!) I used a star tip to pipe it in big spots around the edges and in little dots in the center.

Raspberry drizzle: (5 thawed raspberries, a little water, & 3 tablespoons powdered sugar, mixed well) This didn't turn out well. It was way too clumpy. Hence, it ended up just clumped in the center of the cake rather than drizzled. Hence, the frumpy cake. I'd suggest looking up a better way to do the whole raspberry sauce thing.

White chocolate roses: (white chocolate, melted over low heat and poured into a mold, then refrigerated) I placed these on every other icing clump around the edges and in a trio in the middle.

My mold came from Bake it Pretty

I think I made this recipe sound way harder than it actually is. It's really a pretty simple cheesecake! You could totally do this with just an 8x8 or 9x13 glass pan and a hand mixer (or a whisk and some arm muscles). And other than the white chocolate (and maybe cream cheese), it should be pretty much all ingredients you already have! Just be careful not to burn your white chocolate, and you'll be good! Oh, and don't make your cake into a crime scene by experimenting with raspberry drizzle sauce. Please, learn from my mistakes.