Sunday, May 26, 2013

Glasses USA Giveaway

Recently I was offered a pair of prescription glasses from GlassesUSA.com! They were like "hey, we'll give you a store credit and give one of your readers a store credit and give the rest of your readers a discount code!" and I was like "of course!"

IMG_6607

I wear contacts. I have a pair of glasses, but they're very old. I never wanted to pay for updated eyeglasses because I rarely wear them. But with prices like the ones at GlassesUSA, I can totally afford them! It's hard to buy glasses online without trying them on, but GlassesUSA's" Try-it Mirror" lets you see the glasses on your face.


I was overwhelmed by the many options, so I just picked one of the "best sellers," the Masyn Black. 


Want to try the Try-it Mirror? 


The glasses are great. It's so nice to have a pair with an updated prescription, and since they're not all scratched and outdated like my old pair, I might actually wear them out of the house! The price was right, too!

IMG_6637

IMG_6641

I can't comment on shipping time because mine were accidentally delivered to my neighbor, and I'm not sure how long she had them before bringing them over. I never received a shipment notification email (even though the order confirmation e-mail said I would), so I didn't have a tracking code, which was annoying. 

Another weird thing was the prescription input. The online form wouldn't let me put "none" for the right-eye axis like my prescription said.


It wasn't a big deal because you can email a scanned copy of your prescription instead, so I did that. A few days later someone from customer service called to "confirm" my prescription. I was kind of like "uhh, you have the scanned copy of it, shouldn't that be all the confirming you need?" But they did get my prescription right in the end.

Overall, I'd buy from them again. GlassesUSA is great for the wide selection, virtual mirror, and awesome prices. Downsides include the lack of shipment notification and tracking number, and the inconvenience of having to scan in my prescription and subsequently confirm it via phone, but I'm more than willing to handle those things for the great price! 

IMG_6649

GlassesUSA wants to give y'all 10% off your order (use code "Blog10"), and they want to give a $25 store credit to one of you! Enter to win through Rafflecopter:

Wednesday, May 22, 2013

Spaghetti Squash Parmesan

This recipe was my first experience cooking spaghetti squash, and it went so well! Spaghetti squash = SO tasty! 

IMG_3392-2

Pin It

Recipe adapted from here.

Ingredients:
1 spaghetti squash (about 1 1/2 pound)
4 tbsp butter
6 tbsp flour
2 chicken bouillon cubes
1/2 cup hot water
1 1/2 cups milk
1/2 cup plus 2 tbsp shredded parmesan cheese
1/4 tsp salt
1/4 tsp pepper

Directions:
1. Cut the squash in half lengthwise. Scoop out the seeds and place the squash halves inside-down on a baking sheet. Bake at 350 for one hour, or until tender.
2. Separate the squash strands with a fork and place in a bowl. Discard shells. Leave the oven on.
3. In a large saucepan, melt butter over medium heat. Add flour and stir. Reduce heat to low and cook, stirring continuously, for 5 minutes.
4. Dissolve bouillon cubes in hot water. Stir into flour mixture. Add the milk slowly and whisk to combine. Cook the sauce, stirring continually, until thickened (about 10 minutes). Add in 1/2 cup parmesan, salt and pepper. 
5. Add squash to the sauce and mix well. Spoon the mixture into a 3-quart baking dish. Sprinkle the remaining parmesan on top.
6. Bake about 30 minutes at 350, or until bubbly and golden on top.

IMG_3342
(cut lengthwise)

IMG_3347
(seeds removed)

IMG_3349
(ready for the oven)

IMG_3355
(all cooked!)

IMG_3365-2
(strands separated)

IMG_3368
(butter and flour)

IMG_3370-2
(sauce cooking)

IMG_3373-2
(adding cheese, salt, and pepper)

IMG_3374
(adding spaghetti squash)

IMG_3378
(parmesan on top and ready for the oven!)

IMG_3393
(all done!)

IMG_3401-2
Ta-da!

Enjoy!

    Tuesday, May 21, 2013

    How to Clean Up Old Furniture

    We have a lot of antique furniture from an auction that we frequent. Most of it comes riddled with scratches and dust and strange smells. We're not huge strip-sand-and-paint DIYers, but I do have a simple 3-step method that cleans up the wood, leaves it smelling nice, and gets almost any piece of furniture ready to be displayed in our house. All the pieces of furniture in these photos are auction purchases that got a little love: 


    (the table)


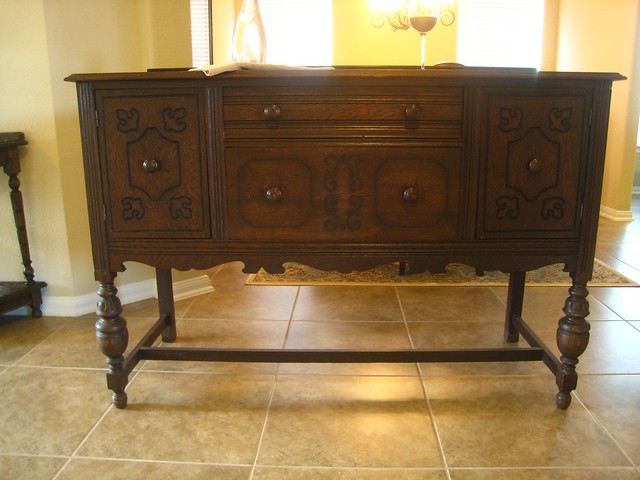
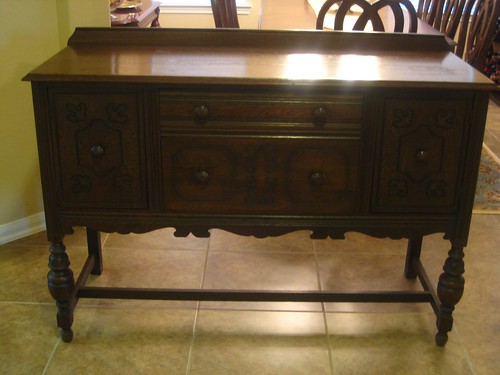
    For a piece of furniture that's totally falling apart, you're going to need to do some extra work. But for your average bought-off-Craigslist or purchased-at-an-auction item that's finished wood, my simple method seems to work great! When we brought home our latest auction purchase, an antique buffet which happened to be in worse condition than anything we'd ever bought before, I thought I'd take photos of my process to share with y'all how I fix the antiques up. 

    You want to put your furniture in a garage or on some easy-to-clean surface (our tile entryway works great for this). 

    IMG_9437
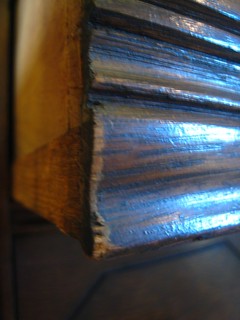
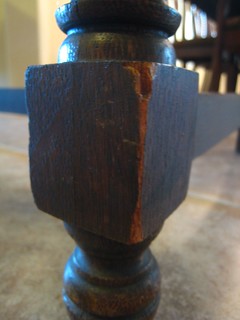
    It may not look bad, but up close, this baby was all scratched and roughed up! 

    Step One: Basic Cleaning

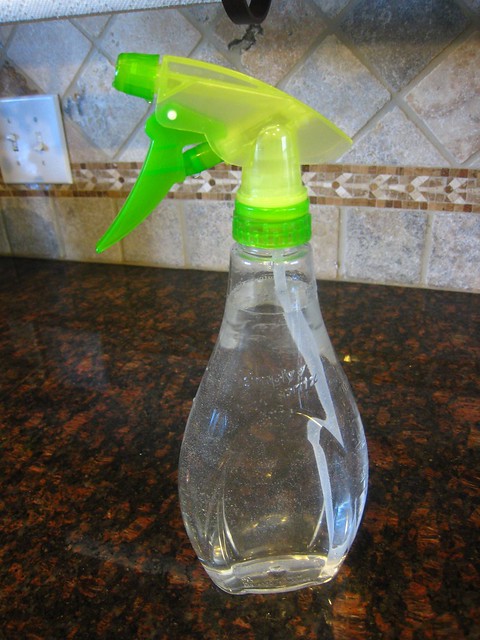
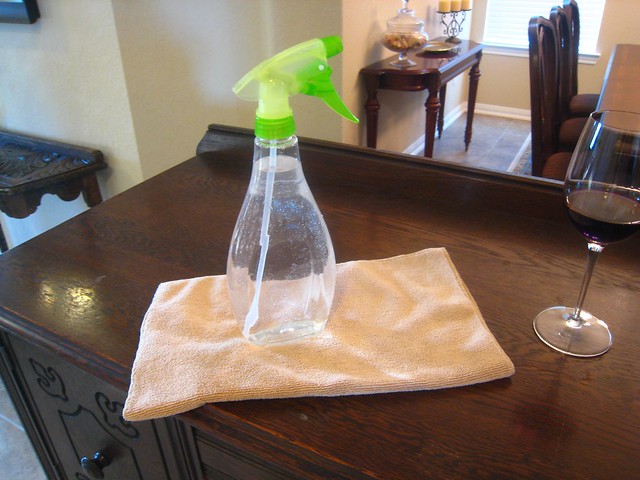
    Get a spray bottle and fill it halfway with water. Fill the other half with vinegar.

    IMG_9426

    IMG_9432

    Give it a little shake to get the vinegar and water all mixed up. I like to add a couple drops of an essential oil as well, just to offset the vinegar smell, but it's not necessary.

    IMG_9430

    Using a microfiber cloth, spray the vinegar solution on the cloth and wipe down the entire piece of furniture. Don't forget to get underneath it, inside the drawers, around the legs, and behind cabinet doors. The vinegar will neutralize any "old furniture" odors, and when it's dry, you won't be able to smell the vinegar at all! 

    IMG_9438
    (Wine is optional! Haha!)

    Make sure you get rid of all dust and dirt. You may even want to vacuum your furniture before you start with the vinegar solution!

    Step Two: Wood Conditioning and Stain Removal

    Get some Murphy Oil Soap


    With another microfiber cloth (not the same one you used with the vinegar), put a little Murphy Oil on the cloth. The directions on the bottle will say to dilute it with water, but don't worry about that. Just put some straight on your microfiber cloth. Then rub the oil into the furniture (along with the grain of the wood). Add more Murphy Oil to your cloth as needed. 

    If there are spots with stains, use a little extra oil and rub the spot until the stain is gone. I've even been able to get small spots of paint off of wood using this stuff! 

    Step Three: Touch-Ups

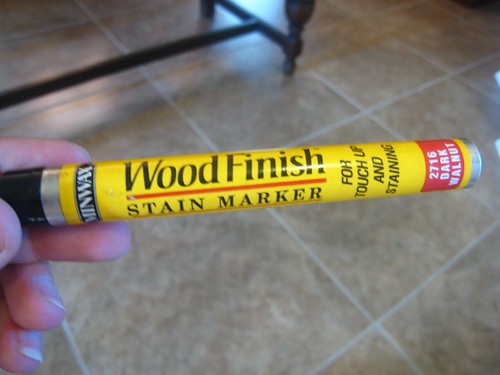
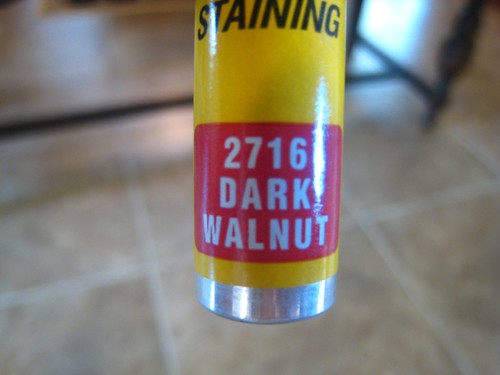
    Once you've got the whole thing cleaned and conditioned, it's time to deal with those scratches and rough spots. My miracle product for this step is the Minwax Stain Marker.

    IMG_9439

    They come in a bunch of colors, but don't worry if the marker color doesn't exactly match your furniture. I've used "Dark Walnut" for every piece of furniture you see in this post, and it always ends up fine (even though the various pieces of furniture have slightly different stain colors). 

    IMG_9443

    Now this is the part that takes a long time. Go over the piece of furniture inch by inch, and touch up any scratches with the stain marker. First, draw a line of stain over the scratch with the marker, then lightly rub it in with your finger so it blends. You may have to do that 2-3 times to get good coverage. For deeper scratches, you may have to press the tip of the pen a few times on the scratch so a little more stain comes out.

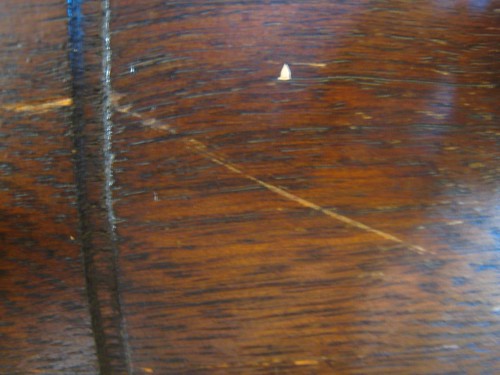
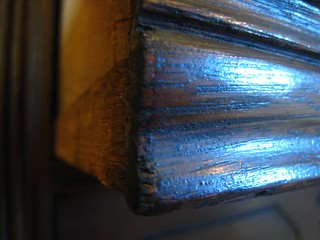
    Here's a picture of a scratch I touched up:

    IMG_9446

    First, I drew lines of stain over the scratches:

    IMG_9448

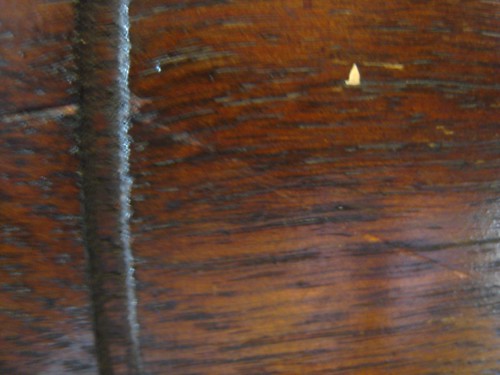
    Then, after rubbing it in with my finger, we had this:

    IMG_9450

    You can see how the scratch is still there, but the color blends in enough that you can't see it if you're more than a few inches away. To totally get rid of the scratch, you'd have to sand it down and re-stain the whole thing, but this method works just fine as long as no one's inspecting your furniture up close!

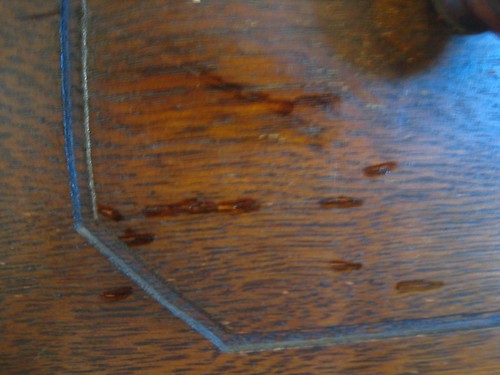
    Here are another couple stain marker fixes:

    IMG_9453
    IMG_9463

    IMG_9465
    IMG_9466

    After going over the entire piece (for the buffet I was doing, it took about 90 minutes), you'll be able to step back and see just what a difference the detailed work makes!

    IMG_9486

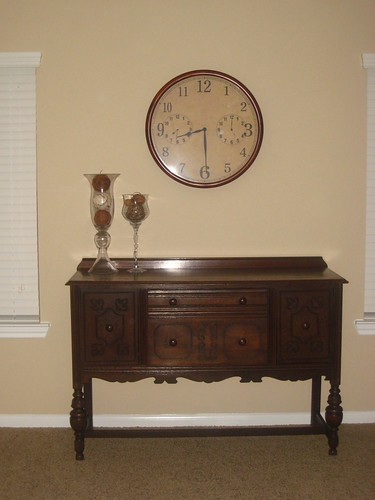
    Our new buffet is now happily living in the game room, awaiting some burlap curtains to go on the windows beside him. :)

    IMG_9660

    Pin It

    Oh, and by the way - if you're wanting to re-do a chair with an new upholstered seat and paint, I have a tutorial on that as well: Refurbishing an Old Chair


    Monday, May 20, 2013

    Baked Chicken & Spinach Flautas

    I try to cook healthy meals. But so often I end up thinking the "healthy" recipes are bland, or boring, or not filling. But this one is actually tasty and healthy! Win win! 

    IMG_3334
    Pin It
    Recipe adapted from here.
    Ingredients:
    4 boneless, skinless chicken thighs (about 1 pound)
    16 oz beer
    2 cups water
    1 tsp paprika
    1/2 tsp salt
    1 tsp garlic powder
    1 tsp cumin
    1 tsp chili powder
    1 jalapeno pepper, minced
    3 cups fresh spinach, chopped
    5 9-inch tortillas (I like to use the green spinach herb ones, but regular flour would work)
    6 oz queso fresco or monterrey jack cheese (or any other melty cheese)
    1 tsp olive oil
    salsa for serving
    Directions:
    1. Put the chicken thighs, beer, and water in a deep saute pan. Bring to a boil, then reduce heat and simmer for 10 minutes. Remove chicken from the liquid and shred it with two forks. Pour out all but 1/4 cup of the cooking liquid.
    2. Put the shredded chicken in a bowl and mix it with all of the seasonings.
    3. Add the jalapeno and spinach to the remaining 1/4 cup cooking liquid. Cook over low heat for 2-3 minutes, or until spinach is wilted.
    4. Cut each tortilla in half. To assemble flautas, spoon chicken along the long edge of each tortilla, then top with spinach mixture and cheese. Roll the tortilla up, starting with the long edge.
    5. Line a baking sheet with foil and lightly spray with cooking spray. Place each flauta seam-side-down on the cooking sheet.
    6. Brush the flautas with olive oil. Bake at 450 for 10 minutes. Turn over and bake for another 10 minutes, or until crispy.
    7. Serve with salsa! 
    IMG_3315
    (cooked chicken)
    IMG_3317
    (chopped spinach)
    IMG_3318
    (chicken with spices)
    IMG_3322
    (spinach and jalapeno cooking)
    IMG_3323
    (these are the tortillas I like to use)
    IMG_3324
    (tortillas split in half)
    IMG_3326-2
    (ready to roll up)
    IMG_3329-2
    (ready for the oven!)
    IMG_3331
    (after flipping)
    IMG_3332-2
    (all done!)
    IMG_3334
    Ta-da!
    Enjoy!