Thursday, January 13, 2011

Peppered Shrimp Alfredo

This recipe is on the spicy side, so if you're not a fan of spiciness, I would cut down a bit on the cayenne pepper (and the bell pepper as well)!


Adapted from this recipe.

Ingredients:
8 oz penne pasta (or some other pasta, I used cavatappi because it's SO CUTE!! Love the little squiggles.) **The original recipe called for 12 oz pasta, but I found the pasta-to-stuff ratio to be a little high, so next time I make this I'll use just 8 oz**
1/4 c butter
2 tbsp olive oil
1 onion, diced
 2 cloves garlic, minced
1 red bell pepper, diced (if you're new to bell peppers, make sure you only use the red part (not the white), and rinse out the seeds before you cut it!)
1/2 pound portobello mushrooms, diced
1 lb medium shrimp, peeled and deveined
1 jar alfredo sauce (15 oz) (I used the "roasted garlic alfredo" kind)
1/2 cup grated parmesan cheese
1/2 cup cream (any sort of cream will do! I used light cream.)
1 tsp cayenne pepper
salt and pepper
1 1/2 tbsp dried parsley

Directions:
1. Cook pasta according to package directions. Drain.
2. Melt butter with the olive oil in a big saucepan over medium heat. Stir in onion and cook until soft and translucent (about 2 minutes).
3. Stir in garlic, red pepper, and mushrooms, and cooke until soft - about 2 more minutes.
4. Stir in the shrimp, and cook until firm and pink.
5. Add in the alfredo sauce, cheese, and cream. Bring to a simmer and stir constantly for about 5 minutes.
6. Add in cayenne pepper, salt, parsley, and pepper.
7. Add pasta into the sauce, warm, and serve (sprinkle with extra parmesan cheese and ground black pepper before serving!).

Pasta - drained and waiting!
LOVE THE LITTLE SQUIGGLES!!!

Onions, mushrooms, garlic, & red bell pepper

After adding the shrimp...

Shrimp is cooked!

After adding the other ingredients!

Mixing it all together

Enjoy!

Wednesday, January 12, 2011

Spinach and Bacon Quiche

I've made this quiche twice now, and both times it was absolutely delicious. Perfect for a light dinner, or for storing in the fridge for quick, yummy breakfasts!


Recipe adapted from here.

Ingredients:
6 large eggs, beaten
1 1/2 cups heavy whipping cream
salt and pepper
1/2 a 10 oz bag of fresh baby spinach, chopped (about 2 cups)
1 pound bacon, cooked and crumbled (cook it a little more than you would normally cook bacon so it crumbles easily)
1 1/2 cups shredded Swiss cheese
1 9-inch refrigerated pie crust

Directions:
1. Preheat oven to 375.
2. Place the pie crust in a lightly greased 9-in pie dish
3. Combine the eggs, cream, salt, and pepper with a hand mixer (or a food processor or blender).
4. Layer the spinach, bacon, and cheese in the bottom of the pie crust, then pour the egg mixture on top.
5. Bake for 45-55 minutes until the egg mixture is set.
6. Cut into wedges and serve!


Thursday, January 6, 2011

Shrimp & Wild Rice Casserole

This is one of Jeff's favorites. Plus, it's pretty simple to make. Easy AND a husband-pleaser? That means I'm a big fan!


Here's the recipe, adapted from this Paula Deen one.

Ingredients:
8 oz wild rice (I used the kind that comes in the plastic pouch that you just microwave)
1 pound shrimp, peeled and deveined
2 tablespoons butter
1/2 green bell pepper, chopped
1/2 onion, chopped
1 can (10.75 oz) condensed cream of mushroom soup
2 cups shredded sharp cheddar cheese
salt and pepper

Directions:
1. Cook the rice. If you're not using the fancy microwave pouch kind, subtract 1/4 cup water.
2. Bring 2 cups water and 1/2 teaspoon salt to a boil in a medium saucepan, and cook the shrimp for 1 minute (just one!). Drain immediately and set aside.
3. Heat the butter in a saucepan and saute the pepper and onion until soft, about 5 minutes
4. Preheat your oven to 325
5. In a large bowl, combine the shrimp, soup, rice, vegetables, and 1 1/2 cups cheese. Add salt and pepper to taste, and mix well.
6. Lightly spray an 8x8 or 11x7 pan with cooking spray.
7. Place the mixture in the dish and top with the last 1/2 cup of cheese.
8. Bake for 30 minutes, or until bubbly.
9. Let it cool for a bit if you want it to be thicker than it is in my photo, below. We were really hungry and couldn't wait. :)

Yummy!

Wednesday, January 5, 2011

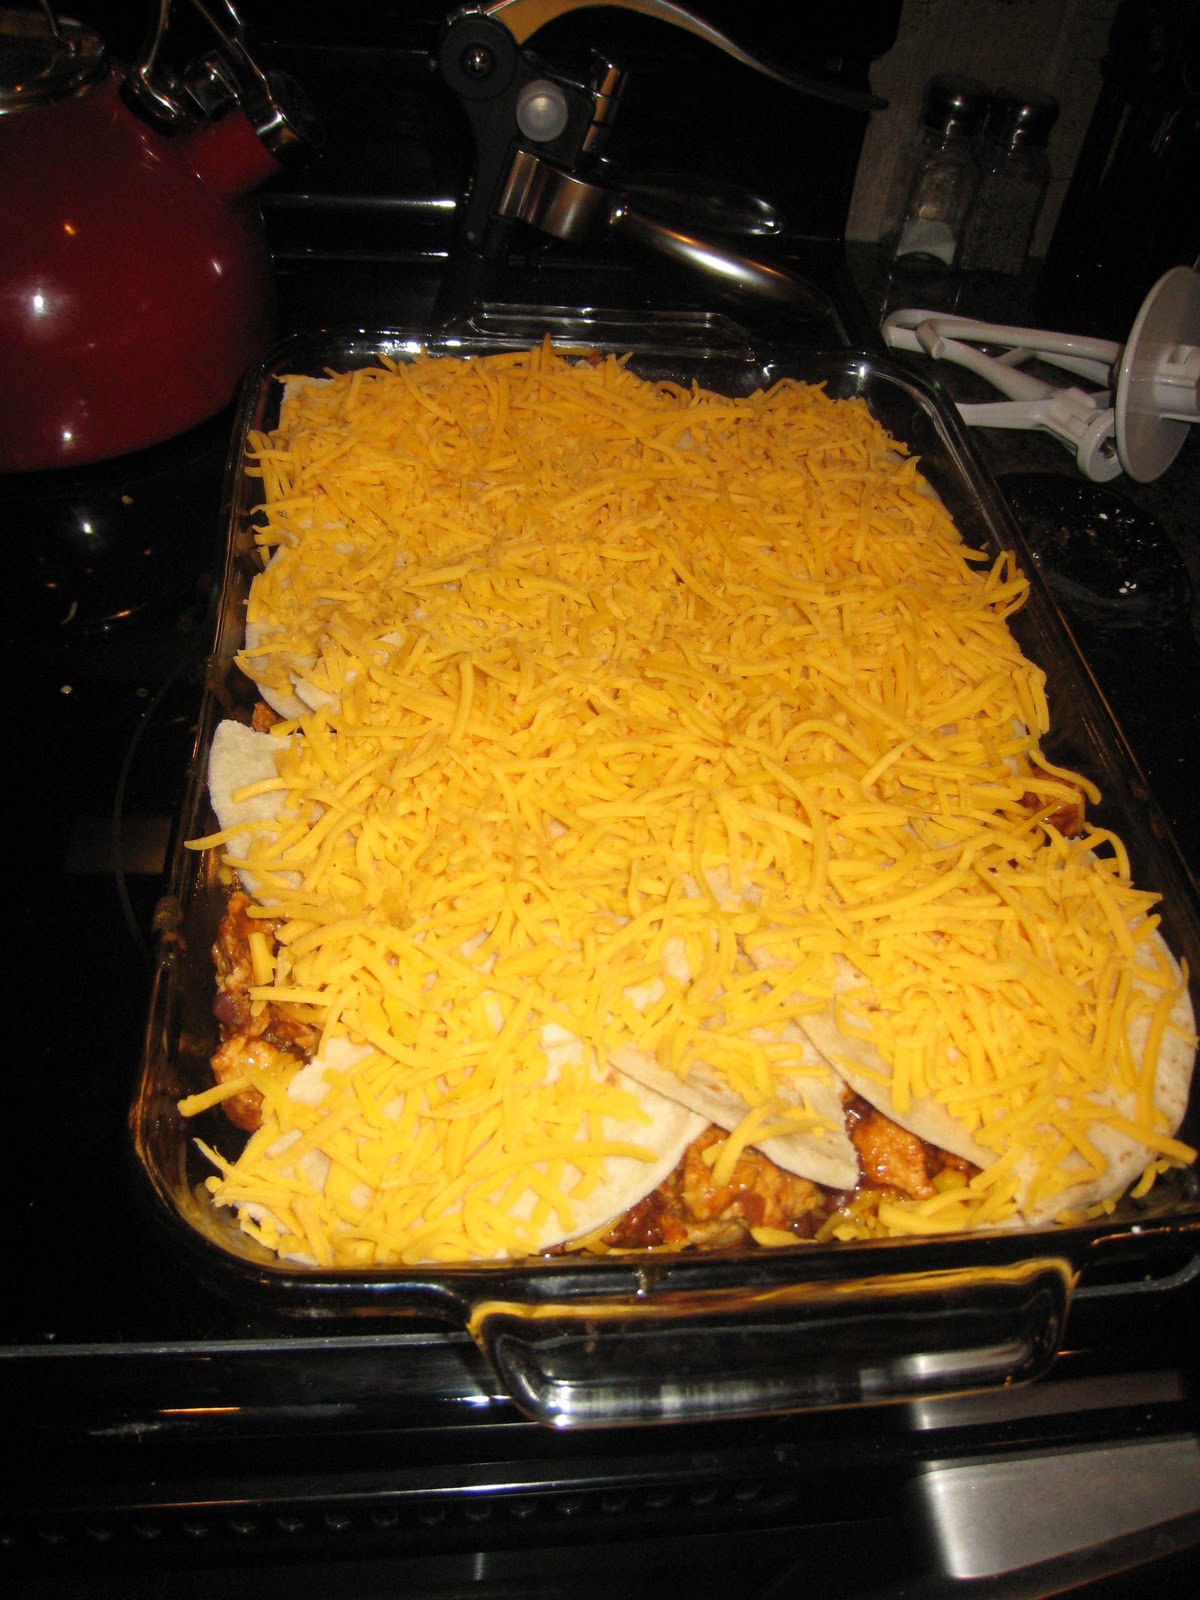
Mexican Lasagna

Here's a great dinner to pair with some margaritas! Adapted from this Rachael Ray recipe.

Ingredients:
3 tablespoons olive oil
2 pounds ground chicken breast (You can find it in the packaged meats aisle. This stuff looks SO gross before it's cooked, but don't worry, it's good!)
2 tablespoons chili powder
2 teaspoons ground cumin
1/2 red onion, diced
1 15oz can black beans, drained
1 cup mild taco sauce
1 cup frozen corn kernels
8 flour tortillas (the fresh ones by the deli are WAY better than the ones in the bread aisle!)
4 cups shredded cheddar cheese
2 scallions, finely chopped

Directions:
1. Preheat the oven to 425
2. Heat 2 tablespoons olive oil in a large skillet on medium-high heat. Add chicken, chili powder, cumin, and onion to the pan. 
3. Stir, breaking up the chicken, for about 5 minutes.


4. Add the corn, black beans, and taco sauce. Heat thoroughly, 2-3 minutes.


5. Coat a shallow baking dish with 1 tablespoon olive oil. Tear the tortillas into quarters to make them easier to layer.
6. Build the lasagna with a layer of meat mixture (half of it), then tortillas (4 tortillas), then cheese (2 cups). Repeat to use all ingredients.


7. Bake 12-15 minutes until cheese is bubbly. Top with scallions and serve!

My husband thinks it's funny that I photograph our food. So he makes shadow puppets on lasagna dishes. :)

I served this the other day when Jeff's family was over with some Mexican creamed corn (canned cream-style corn, fire roasted green chiles, cream cheese, cornstarch), and a taco salad (lettuce, taco sauce, tortilla chips, tomatoes, shredded cheddar cheese, onions + Catalina dressing). Oh, and chips & salsa and margaritas! Yum!

Sidenote: Every time I chop scallions, my hands smell like scallions for at least 48 hours, regardless of how many times I shower and wash my hands. Does this happen to anyone else, or am I just crazy? 

Sunday, January 2, 2011

My First Cheesecake!

Chocolate Cookie Cheesecake:

In hindsight, I probably shouldn't have picked such a complicated recipe for my first cheesecake. I also probably shouldn't have volunteered to bring it as dessert to Christmas dinner since I had never made it before. But, despite my intense fear and nerves while making it, it turned out great!

Ta-da!

Mmmm!

This is kind of a complicated recipe. The cheesecake has lots of layers. It goes like this...

Chocolate layer (on top)
Sour cream layer
Cheesecake layer #2
Cookie layer
Cheesecake layer #1
Crust (on bottom)

Here's the recipe (adapted from here):

Ingredients:
CRUST:
2 cups chocolate sandwich cookie crumbs (I just used the store brand, but use Oreos if you're feeling fancy!)
2 tbsp butter, melted
1/4 cup brown sugar, packed

CHEESECAKE LAYER(S):
2 lbs cream cheese, softened (4 8oz packages)
1 1/4 cups white sugar
1/3 cup heavy whipping cream
2 tbsp flour
1 tsp vanilla
4 eggs

COOKIE LAYER:
1 1/2 cups crushed chocolate sandwich cookies

SOUR CREAM LAYER:
16 oz sour cream
1/4 cup white sugar
1 tsp vanilla

CHOCOLATE LAYER:
1 cup heavy whipping cream
1 1/2 cups semisweet chocolate chips
1 tsp vanilla

Directions:
1. CRUST - combine crust ingredients in a medium bowl. Firmly press the mixture onto the bottom and 1 inch up the sides of a 9-in springform pan. Bake at 350 degrees for 5 minutes.
2. CHEESECAKE LAYER - Beat cream cheese until smooth. Gradually mix in 1 1/4 cups sugar, 1/3 cup whipping cream, flour, and 1 tsp vanilla. Beat in eggs one at a time. Pour half the batter on top of the crust in the springform pan.
3. COOKIE LAYER - Top the first cheesecake layer with the 1 1/2 cups of cookie pieces.
4. CHEESECAKE LAYER - Pour the rest of the cheesecake mixture on top of the cookie pieces.
5. Bake at 350 degrees for 45 minutes, then remove from the oven.
6. SOUR CREAM LAYER - Combine sour cream layer ingredients (sour cream, sugar, vanilla). Spread evenly on the cheesecake (when you pour it in, pour more on the edges than the middle so the middle doesn't sink!). Bake at 350 degrees for 7 more minutes. Turn the oven off, and leave the cake in the oven for 30 minutes.
7. Remove the cheesecake and let it cool completely on a wire rack.
8. CHOCOLATE LAYER - Combine the chocolate chips and 1 cup whipping cream over low heat in a sauce pan. Stir until chocolate melts, then add in the 1 tsp vanilla. Pour the chocolate mixture over the cooled cheesecake.
9. Refrigerate at least 8 hours. Remove from the fridge at least 30 minutes before serving, remove the springform ring, and decorate!

I started with a fudge icing border around the edge, piped on with a star tip. The I went with fudge icing in little clumps around the perimeter and in the center. Then I put chocolate sprinkles on the clumps, and stuck half a cookie on each perimeter clump. All done!

Here's what it looks like on the inside! Yummm!

Thursday, December 9, 2010

Catfish Cakes

I really like crab cakes. But crab meat is expensive. Solution: catfish cakes! These taste so close to the real thing, and they weren't even that hard to make (for some reason I had built up crab cakes in my head to be a labor-intesive and difficult food)!

Recipe adapted from here.

Ingredients:
1 pound catfish filets (I used the frozen kind - three big filets!)
1 small onion, chopped
1 teaspoon prepared yellow mustard (I used spicy brown mustard)
1 tablespoon creamy salad dressing (I used Mayo w/ olive oil)
1 teaspoon Old Bay Seasoning
1/2 teaspoon lemon pepper (I'm not sure how much of this I really used... I just dumped it in there)
1/2 teaspoon garlic powder (again, not sure exactly how much I used)
Salt and pepper to taste
2 1/2 cups coarsely crushed buttery round crackers (I used Club crackers)
1 egg
1 cup vegetable oil (for frying)

Directions:
1. Boil catfish in water for about 5 minutes, or until the fish flakes easily with a fork. Drain the fish, and mash it up with a fork. (You could also bake the fish and then mash it)
2. Stir the onion, mustard, seasonings, crushed crackers, and salad dressing into the mashed fish.
3. Add the egg and mix until evenly blended.
4. Heat oil in a large skillet over medium-high heat. Form the fish mixture into patties.
5. Take each patty and dip both sides in flour. Then, put into the oil. Fry on each side, and drain on paper towels.

Now for the explanatory photographs:

I think I left my catfish boiling a little too long. It flaked with a fork WAY too easily when I tried to get it out of the water!

Here's my catfish post-fork-mashing.

Chopped onions! (anyone else's eye's get watery just looking at this? Oh, classical conditioning.)

The best way to crush crackers is to stick them in a freezer-duty bag and then hit it with your fists until you're feeling totally stress-free!

Here's the mixture with everything added in...

Dipping the patties in flour...

Mmmm, fried food! If you're like me and you haven't fried anything in a while, you should make this recipe. I so enjoyed the sizzling on the stove!

Ta-da!

We ate them just by themselves with green beans, but some sort of tartar sauce would be yummy with them!

Enjoy!!

Thursday, November 11, 2010

Oatmeal Walnut Chocolate Chip Cookies

Or, "Oatmeal Chocolate Chip Cookies" (if you leave out the walnuts!).


Recipe adapted from here.

Ingredients:
1 cup butter, softened
1 cup packed brown sugar
1/2 cup white sugar
2 eggs
2 tsp vanilla extract
1 1/4 cups flour
1/2 tsp baking soda
1 tsp salt
3 cups quick cooking oats (I used the old-fashioned, not quick-cooking kind, and it was fine)
1 cup chopped walnuts (optional)
1 cup semisweet chocolate chips

Directions:
1. Preheat the oven to 325 degrees.
2. Cream together the butter and both sugars until smooth.
3. Beat in the eggs one at a time, then stir in the vanilla.
4. Add in the flour, baking soda, and salt. Stir until just blended.
5. Mix in the oats, walnuts, and chocolate chips. 
6. Drop by heaping spoonfuls onto a cookie sheet sprayed with cooking spray.
7. Bake for 12ish minutes. Cool on wire racks.
8. Eat with a glass of milk! Mmmm!


These were a favorite at law school as well... hopefully you'll enjoy them too! Happy baking!